Cubernetes
Posted on July 5, 2022 • 10 minutes • 2000 words
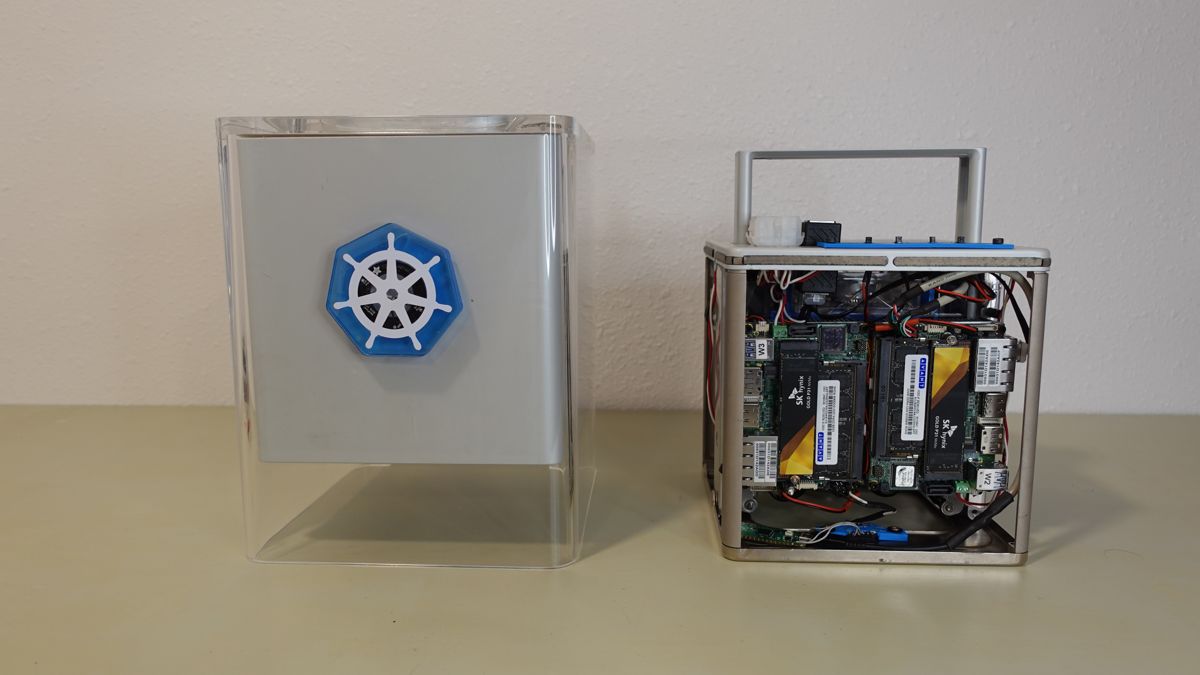
It took a few months to plan and about three weeks to build my latest Kubernetes hardware lab. I tested with the new EKS Anywhere bare metal provisioner to install the OS and manage Kubernetes. The cluster is going to be used for training and video content for the Containers from the Couch channel and various in person conferences. Let me know if you have a meetup/conference you would like me to come to via email .
This blog post will include a parts list and process for anyone who wants to do something similar. I work at Amazon and this was a work project. If you have a cool Kubernetes cluster I’d love to see it.
Parts and tools
All prices are approximate and rounded to the nearest dollar. Taxes and shipping not included.
Compute and networking
- 1x - $200 - Apple Power Mac G4 Cube (via OfferUp )
- 4x - $1345 - LP-179 computers with 32GB memory
- 4x - $94 - 1TB NVMe drive
- 1x - $16 - NETGEAR 5-Port Gigabit unmanaged switch
- 1x - $8 - RJ45 coupler
- 5x - $2 - Ultra super flat CAT6 cables
- 1x - $8 - Raspberry Pi pico
- 1x - $13 - 5v power step-down regulator
- 1x - $12 - ATtiny85
- 1x - $25 - Maxtrx Portal M4
Power
- 2x - $37 - MEAN WELL LRS-350-12 Switching Power Supply
- 1x - $12 - 15A power sockets
- 1x - $11 - Molex 12 wire connector
- 1x - $6 - PC power switchs
- 1x - $12 - 1⁄2” braided cable sleeving
Lights
- 1x - $8 - NeoPixel Ring - 12x
- 1x - $30 - 32x32 RGB LED Matrix Panel - 4mm Pitch
- 1x - $65 - Skinny RGB strip lights
- 2x - $7 - Magnetic connector
- 1x - $9 - 80mm fan
- 1x - $15 - 1⁄4” Transparent blue acrylic
- 1x - $10 - 1⁄8” Frosted acrylic
Tools
- 1x - $236 - Creality Ender 3 Pro 3D printer
- 1x - $19 - Blue Filament
- 1x - $16 - Wire crimp connectors
- 1x - $24 - Assorted screws, washers, and nuts
- 1x - $12 - Plastic standoffs
- 1x - $14 - Heat shrink tubing
Total parts = $6310
I used a lot tools I already owned such as a dremel, hot glue gun, soldering iron, wire cutters. I also used some tools from friends such as a Glowforge for select parts. There were other parts I didn’t use because of space limitations and implementation differences between my plan and reality. All of the parts and tools listed above were used in the cluster.
Build planning
When I started working with EKS Anywhere for bare metal I knew I needed a new home lab. This time I wanted to build something that could be used to validate the software, something self-contained and portable, and something to show visually what the software does.
I was going to write an app that showed diagrams and animations via a browser, but I wanted something without using a browser. It takes you away from the hardware. I wanted to have embedded systems and lights.
I have an old Macintosh Classic that I thought would make a good candidate for the build, but the case was too bland. I thought about painting it and filling the monitor opening with a light panel, but I knew there had to be a better option.
When talking to a coworker about the idea we started talking about iconic computer cases and I remembered the Mac Cube. I would be constrained because of the 8” size and the Kubernetes system requirements but once the name “Cubernetes” came to me I knew I had to use one for this build.
I’ve run plenty of raspberry pi clusters in the past, but EKS Anywhere wasn’t going to support arm architecture at launch and I wanted machines with at least 16GB of memory to make sure I wouldn’t hit resource limits with a single node control plane.
I bought a Mac Cube and started taking measurements to see what would fit inside. I looked at lots of different options and landed on the Pico-ITX form factor. Unfortunately, there aren’t many options in that size, but someone on twitter told me about the LP-179.
The LP-179 has Intel AMT support for out-of-band management and this was the perfect option for compute. The computers are designed to be used in custom installations and don’t have standard interfaces for power which was concerning at first but ended up being great. They had plenty of extension options and the computers came with every cable add-on I could want. The Global American support was also very responsive and helpful with a few of the problems I ran into.
Once the computers arrived I did some initial testing with early EKS Anywhere builds to make sure everything would work and then started ordering the rest of the lights and case components.

Case Build
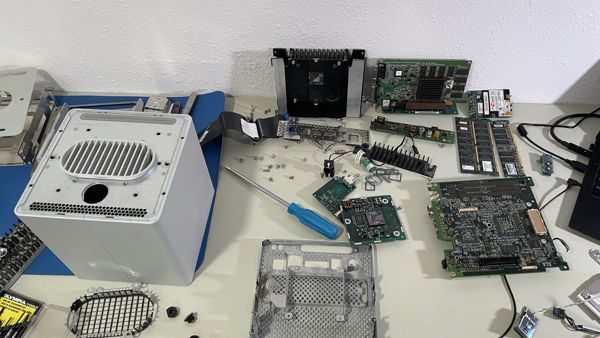
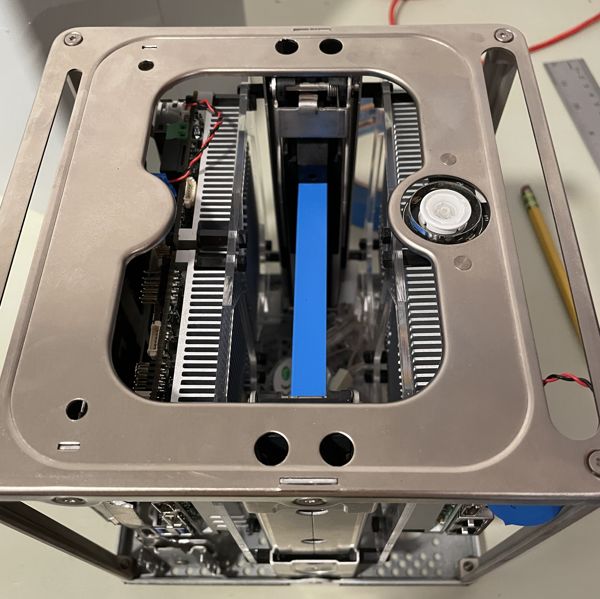
Taking apart the Mac wasn’t hard. I wanted to re-use the central handle mounting mechanism to take the compute cage in and out of the outer shell. If you’ve never seen the original keynote it was quite amazing back in 2000 .
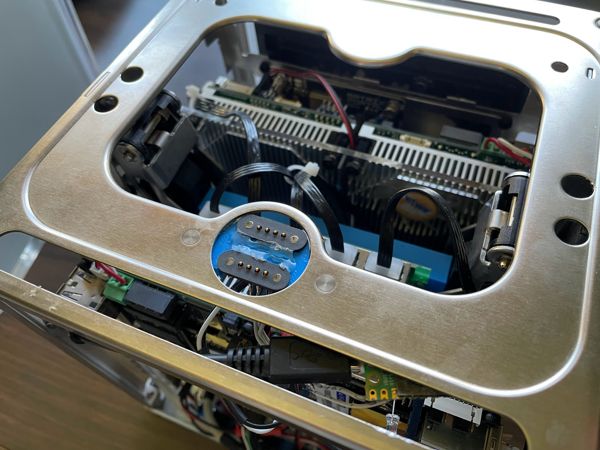
When took everything apart I thought I would have a lot of room left over. That didn’t turn out to be true, but I was able to fit all the networking components inside the case which I didn’t expect initially.
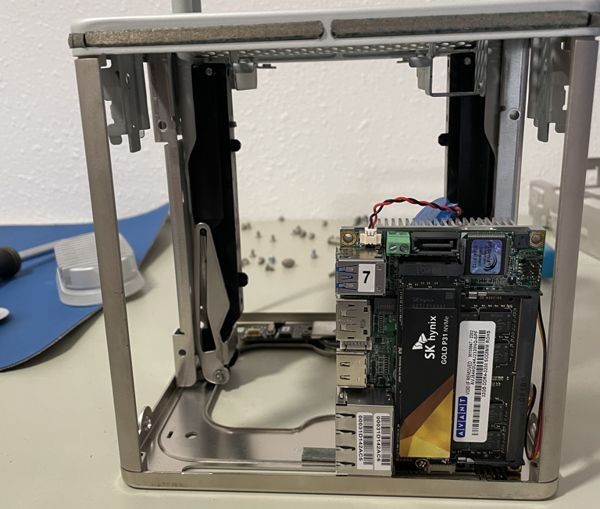
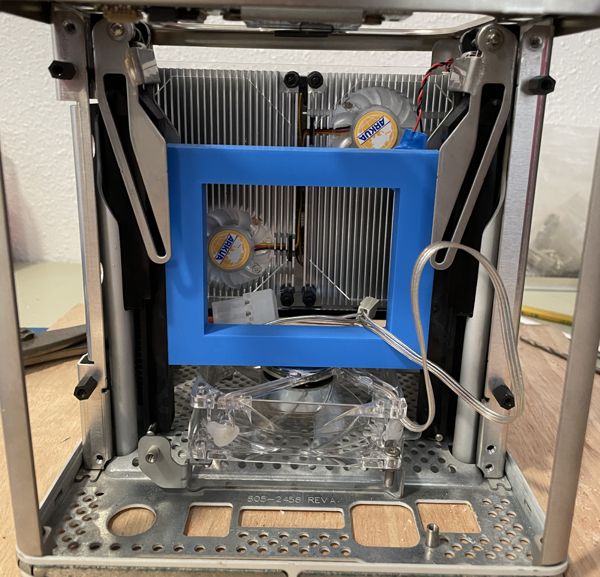
The cage gave a lot of structure for the inner cube, but didn’t give me a lot of options for where to mount the computers. I would need to take apart after building the case to work on the computers so I didn’t want to glue anything and wanted to make components as modular as possible. I 3D printed a center bracket to hold the latch handle in place. I later realized it would be the best place to mount the network switch so I printed a version with mounting holes and parts to hold the bracket to the bottom of the case.
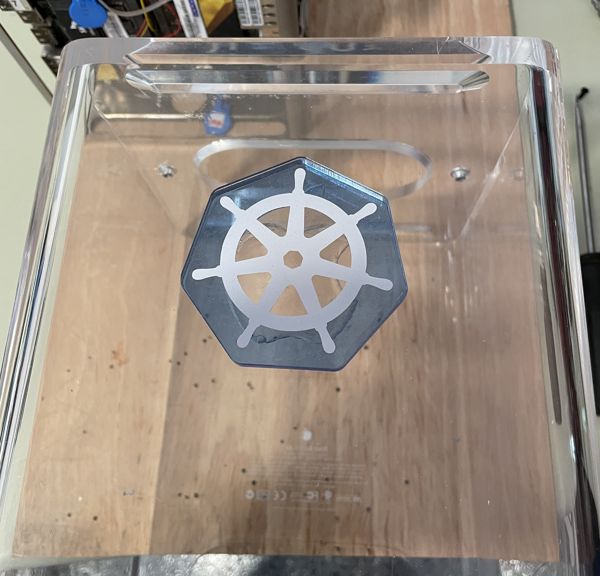
I thought I could 3D print a bracket for the computers, but they’re too heavy and the part needed extra holes for air flow so filiment wouldn’t be strong enough. A friend cut the front Kubernetes logo with their Glowforge and offered to cut computer brackets for me too.
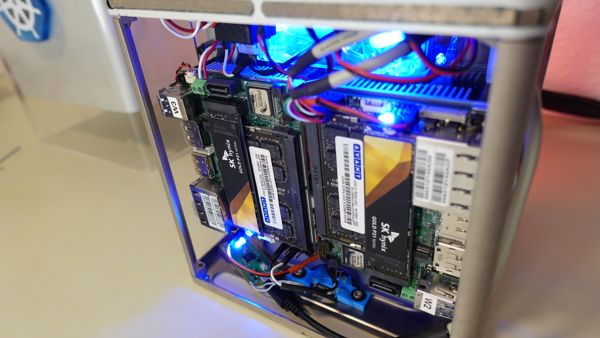
My initial measurements were off and I didn’t mount the computers low enough in the case for the handle latches, but after lowering the mounting holes I was able to make it work. The acrylic is pretty strong and the whole compute module can slide out of the case as one piece which makes it much easier to work on.
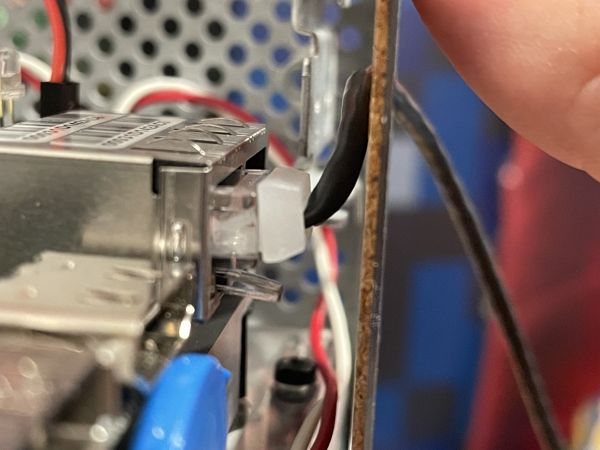
The computers don’t have much clearence on the edges so I had to buy special network cables with really small connectors to clear the sides. I was a bit worride I wouldn’t be able to find somethnig small enough, but thankfully I found some that worked.
Power
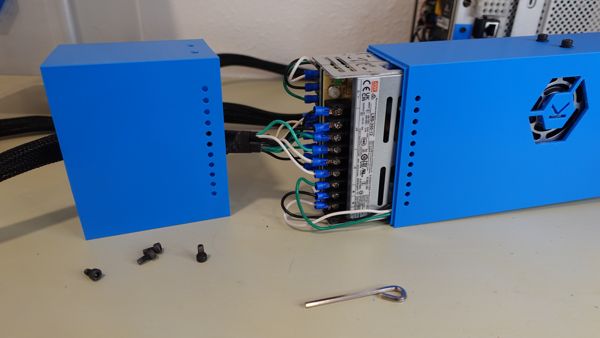
The cluster is powered by two 350w power supplies each with 3 power terminals (6 total). This turned out to be perfect for what I needed because there are 4 computers, 1 switch, and 1 case fan. The case fan could power from one of the computers, but I didn’t want cooling to be tied to a single computer. I bought a 5v regulator for the switch and was able to power on everything outside the case to test it.
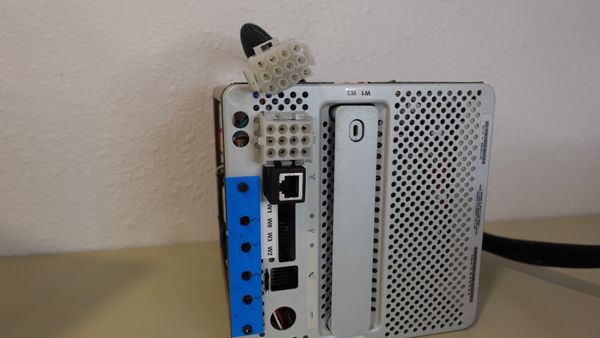
I bought a 12-pin molex connector so I could have a single power plug for everything. I cut four PC power cables to re-use the internal wires (3 each). That gave me a total of 12 wires in 4 cables which I bundled together and wired into the molex connector. The molex receptical required a bit of dremeling and hot glue.
The power supply case took me some time to design after taking multiple measurements of the power supplies. I designed it so the top portion would come off so I could adjust wiring if needed. Each half of the case took over 2 days to print.
It’s great having two separate switches to power on the computers and very satisfying to turn on.
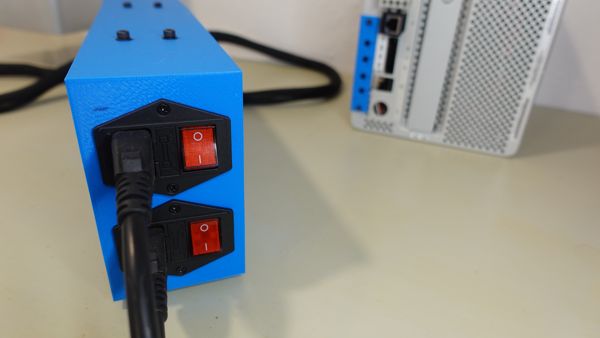
For the computer power switches I printed a small bracket and hot glued them in place. The hardest part was remembering which switch goes to which computer.
I also soldered LEDs onto each board where the case fan pins are so I could know when each computer was powered on.
Lights
There are three different lights that can be programmed on the case.
The first is the front logo which uses an attiny85 controller and 12 LED neopixel light ring. It sits nicely in the acrylic heptagon logo and the power wires go inside the case and connect to one of the computer’s USB ports. Thankfully, the USB port power is always hot when the computer has power so the light starts once the case has power even if the computer isn’t turned on.
The attiny is programmed in C using the Arduino IDE. The program for the front lights cycles in a loading pattern for about 2 minutes and then switches to an infinite breathing pattern. The front lights are not dynamically controled but I can take off the logo and re-program it if I need to.
The hardest part of the logo was getting power to the front of the case that could also be easily disconnected when the internals are removed. I decided on using magnetic pogo pins and 3D printing a bracket that would sit where the old power button was.
It took multiple attempts to get this printed correctly to hold the pogo pins and align when the inner cube was in the case. It still doesn’t work 100% of the time and the internal wires get pinched sometimes which stops the lights from working. I’ll likely need to re-wire this part to keep the wires on the outside of the cube.
The rear lights are connected with the same magnetic connector and are controlled via the raspberry pi pico controller. The reason I wanted this controller was because it works with Circuit Python .

Circuit Python has a lot of libraries for programming the lights and it mounts to the computer as a USB mass storage drive. Using the USB drive with a Kubernetes volume I’m able to re-program the lights using a Kubernetes deployment.
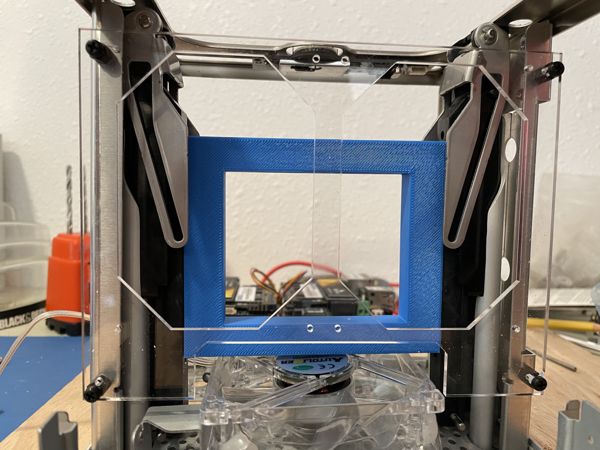
The final light for the case is the 32x32 light panel mounted inside the case. I wanted these lights to show more details about what was happening in the cluster and they have the most flexibility to program. It fits nicely mounted to the the old CD-ROM drive mount (once it was heavily modified).
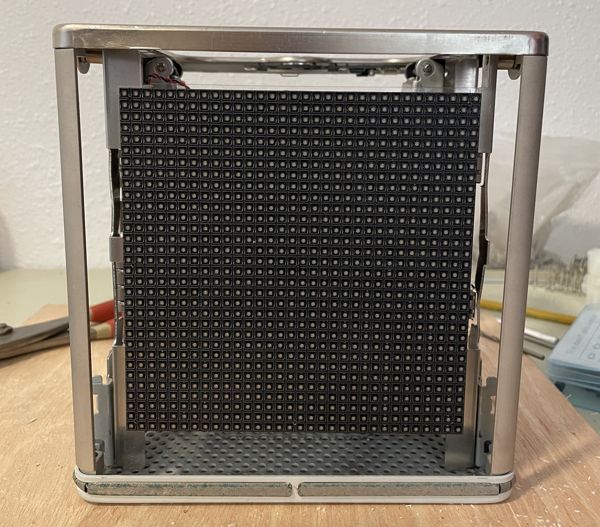
After installing the panel the LEDs were too hash and hard to see so I put some frosted acrylic in front of it to diffuse the light. It’s much easier to see now, especially when the room is already light.
Usage
Once everything was built the cluster can be plugged in with a single power cable and single network cable. The cluster is portable, but only time will tell how durable it is. It’s very satisfying pulling the compute out of the case. This gif was an early test that everything would work.
I’ve been able to re-deploy EKS Anywhere to the cluster without any issues and heat hasn’t been a problem (so far). With additional fans in the case it seems there’s enough airflow even without a lot of space.
I’m looking forward to programming the lights with different visualizations for node migrations, workload scheduling, and gitops workflows.
I know there are cheaper ways to bulid a home lab Kubernetes cluster. My goal wasn’t to build a cheap cluster—see my privous post for a 4 node cluster under $100 .
What I really wanted to do for this cluster was build more visual, educational content into the hardware and have something I didn’t need to hide in a closet.